Tuesday

Week 7 Process

This week we worked hard to create our final images for the boards and to get everything rendered.
Here are some images we have so far:


We hope to have our final boards
posted next week after our presentations.

Week 6 Process

This week we focused on finalizing all of necessary pieces of the clinic, site, and interiors.

We started to apply materials to the inside of the lobby:


We chose our final materials for the exterior. We picked limestone and metal panels to define our connecting modular spaces on the outside. The back shows how the layers with the materials read as separate blocks.

We also finished the top of the atrium, making it tall and sloped to block the west sun:


To the strip mall we decided to add a defined walk space with ramps.
It sets the parking spaces farther back and give more room for green spaces in front of the strore entries:

Monday

Week 5 Process

     Our plans have further developed towards presentation quality.  The Women's Center and classroom areas on the first floor have now been detailed as well.

First Floor:

Second Floor:


Third Floor:


The strip mall "facelift" is beginning to come along digitally...
 ...as well as in the usual sketch form

We have also began taking into account the mechanical systems and where they will be located, as well as chase spaces:

Sunday

Week 4 Process

In Week 4 our group focused on redefining the floor plan to make sure it is all lined up on the axes. Also we eliminated one of the openings to the above, leaving us only with the central atrium. That allowed us more square footage on the send level and made our central atrium a focal point. Our Conference/Class Room moved towards the back of the building. The public restrooms are placed in the most convenient location.

First Level:


Second Level:


Exterior View:


Interior Design Students started modeling interior spaces to get a better idea of the space.
This is just a rough draft:


The Site plan is still in a progress:


Week 3 Process

This Monday was our trip to HKS in Dallas for our half-way critiques. It was nice to see a professional firm, and have them comment on our work.

Some of the things we heard in our critiques that we needed to work on were:
- To continue to refine our site plan and floor plans with special attention to the placement of our elevators and the organization of community spaces within our lobby area
- to more clearly demonstrate the connection between our clinic and the surrounding area and people
- and to refine our structural grid.
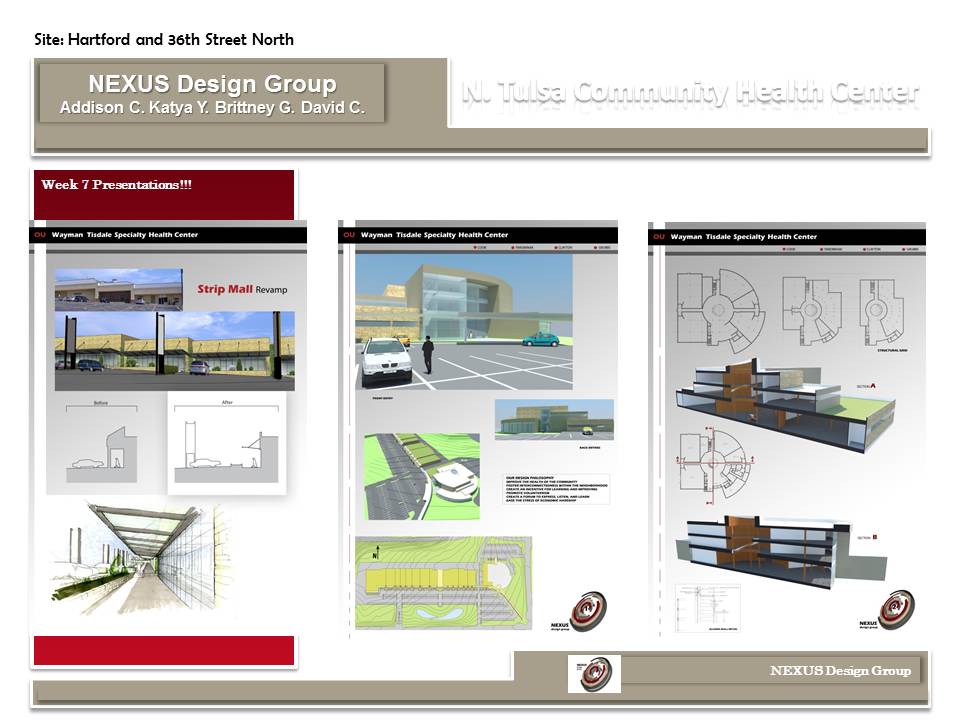
We defined our grid to the point that it works on all levels, and will begin to figure the approximate sizes of the columns.


In order to make our structural grid correct, we needed to size our plan back into a truely radial organization as it was orignially. This didn't change much with the inside space sizes aor positions. By trying to situate our elevators in different parts of the building, it eliminated eliminated our central core. This allowed for us to experiment with an atrium, which we decided to keep at the end of the week. Having the atrium go through to the roof, we had to move our upper floor rooms around. This is what we ended up with.
We will refine each floor a little more, adding our stacked bathrooms in the space we determined.


For the next week, we will begin to design the 8,000 square feet of the interior and begin applying real materials, glazing systems, and shading devices to the exterior of our building. We will also play with the design of the bustop and try to create a concrete site plan with a park area.

Week 2 Process

          This week we focused on completing the floor plan, making the massing more concrete, coming up with ideas for our bus stop, and situating the building on the site with vehicle and pedestrian circulation.

          In our floor plan, we continued the strong curves into the interior. We situated the elevators in the center of the lobby. We created a two-story open area at the entrance. The only difference in the placement of the rooms from our bubble diagram was to move the lab to the west wall, allowing for the continuing of the opening form the first floor, and to not compromise the fire escape in the southwest corner.


          For our site we created a direct pathway from the bus stop on the corner past the entrance and connecting to the existing sidewalk of the strip mall. Along those routes be placed our farmer's market area and an additional covered drop off area from the parking lot. We developed the split between in the clinic and the mall by created a two-sided drive-trough and drop off area for the pharmacy and Urgent Care. We also played with ideas for green roofs and a water retention pond.

          Our bus stop imitates the outside of our building's main facade in order to create a strong connection between the two.


          We took a mini field trip to Norman Regional Hospital to look at how they did their interiors and how they connected it to the outside. We loved to roofing materials they used and the circulation, but we learned that many areas that were supposed to be used for de-stressing and enjoyment were never used. They also had an outside water retention pond and amphitheater, which we are still playing with, and they used nice flooring materials to define spaces and create less of a hospital feel. There was also a couple examples of small two-story open areas that had closed spaces looking down into the area. We thought it was a great built example of a few things we were trying to accomplish in our spaces.

          For the next week we want to respond to the critiques we get on Monday, and then continue with the materiality of our interior-exterior connections, begin formalizing the site, the 8,000 square feet interior, the structural system, and the final building materials.